blog

Love Hearts 11

My first pedal build was a Timmy clone. Then I made a Jan Ray clone which is a clone of the Timmy. But there’s also another clone in the game – the Lovepedal Amp Eleven. So I made one with the layout from tagboardeffects.

I used a violet coloured enclosure and red 1510 Davies knobs (from Tayda) and the combination of “Lovepedal” and violet reminded me of Swizzels Love Hearts sweets. Remember those?


So far, this is proving to be my favourite pedal out of the three. And I very much like the design concept. 🙂

Luna Makeover

Feeling smug and pleased with the results of the Fuzz Factory Makeover I made the decision to blow out the Posca pens and just print the pedal art on a printer.

So here’s another makeover.

This was a Skreddy Lunar Module Deluxe clone I built earlier (in fact, my second pedal). Once again, this was done with Posca pens covered with cold sick Rustoleum Clear Coat.

Looks a bit ropey:


And here’s the makeover with printed decal and Envirotex top-coat (so shiny you can see the iPhone camera reflected):

I think this one’s a tad nicer. 😉

Fuzz Factory Makeover

A while ago I built a Fuzz Factory pedal and thought that it might look cool if I hand painted a bare enclosure with Posca pens and sprayed it with Rustoleum gloss clear coat.

Wrong.

It didn’t look cool and any Rustoleum product is crap (their paint is like treacle, and their clear coat disintegrates). It would have looked better if I had poured a bucket of cold sick over it:


So, this week I disassembled the pedal, sanded it down and re-did the finish with a printed sticky decal and covered it with Envirotex Lite.


It’s an improvement I think:

Building a Pedal Part 11

And now I’m going to finish this pedal build. Huzzah!

But before I do that I’ll share my method for mounting the LED.

I don’t like LED bezels and prefer to have the LED poking through a 3mm hole in the enclosure. I found a useful method to achieve this in a forum post over at diystompboxes.com. It consists of a 5×5 hole piece of vero board with a hole drilled in the centre. I drill this hole just large enough so the LED can poke through it:


Then I glue this small piece of vero, track side facing outward, to the inside of the enclosure with the hole lining up with the LED hole.

The LED is pushed through the hole so it just pokes out the top of the enclosure. The LED legs are soldered to two vero tracks. Later on I can solder two connections from the main board and to the stomp switch to these tracks. Handy.

I suppose I could hot glue the LED into the hole but if I need to add a CLR I can solder it onto the mini-board here.


I then attach all of the pots, the DC socket, the mini switch, the stomp switch and the two jack sockets in the side:


Then I start on the off-board wiring using the wiring layout found over on tagboardeffects:


First off, I solder the connections between the pots, jacks and the stomp switch:


Then I add some polarity protection.

Here’s a Schottky diode soldered on the positive terminal of the SC socket. Wired in series, this protects against inadvertently powering up the pedal with the positive and negative terminals swapped.

I’ll put some heat-shrink over this to hide it:


Here are all the connections completed. (It’s a bit mad that the circuit board is so tiny compared to all of the real estate taken up by the hardware)


And here it is!

Finished. 🙂

I need a beer…

Building a Pedal Part 10

I poured the Envirotex Lite 4 days ago on Sunday, and after about 12 hours I knew that I hadn’t messed it up with the wrong proportions because it was hardening nicely (oo-er, missus!). It’s best to give it a few days to fully harden (oo-er miss….oh never mind…).

Now it’s time to drill out the ET from the holes.

The Finishing Tutorial by JuanSoloFX has a top tip before drilling:

“When the Envirotex has cured, before you drill, apply some Rain-X (automotive stuff used on windscreens and motorbike visors). It fills in all the pores and no ‘tex dust gets in there. It remains smooth and shiny. WIN!”

I got some from Halfords. Smells very chemically so I guess it’s not good for your health.


Then the first thing I do is manually drill out the 3mm hole for the LED. I know that some pedal builders leave this covered with ET, but I like the LED to poke through the hole. As I don’t have a drill stand, and the chances of me hitting the exact spot while holding the drill are slim, I do this with a 2mm drill bit and use my fingers to twiddle the drill bit to make the hole, and then move on to a 3mm drill bit. Takes a while, but it’s worth getting it right. If you have a drill stand you probably don’t need to do this.

TOP TIP – drill and apply pressure from the face of the enclosure! If you work and push from the back/inside of the enclosure you’ll put pressure on the decal and ET and it’s likely to lift away leaving a nasty raised area. Push down onto the ET!


Now I use the stepper drill bit to drill out the larger holes.

Another top tip when using a stepper drill bit – the hole for the stomp switch is 12mm, which is the last step on my drill bit. This drill step is close to the chuck of the drill and there’s a danger that the rotating chuck will touch the ET as you advance the drill. I did this on my last pedal, so be careful!

The drilled ET is like grated Parmesan cheese:


The holes are all drilled, and the Parmesan ET cleared away.

Now the hardware is collected ready to (finally!) put the pedal together:

Building a Pedal Part 9

Today I’ll pour the Envirotex on top of the enclosure. I always find this part a bit nerve-wracking as it requires so much baby-sitting and I’ve messed it up before now.

The best guide for this part of the process is the Finishing Tutorial by JuanSoloFX.

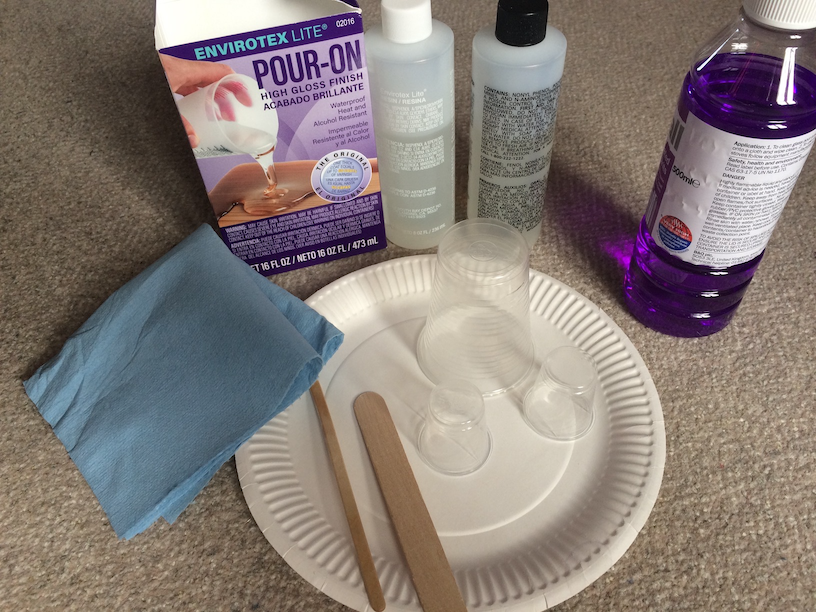
Here are all the bits and pieces that I’ll need:

Envirotex Lite – I get this from Amazon. It is shipped from the US but when I ordered mine it only took about 4 days to arrive.
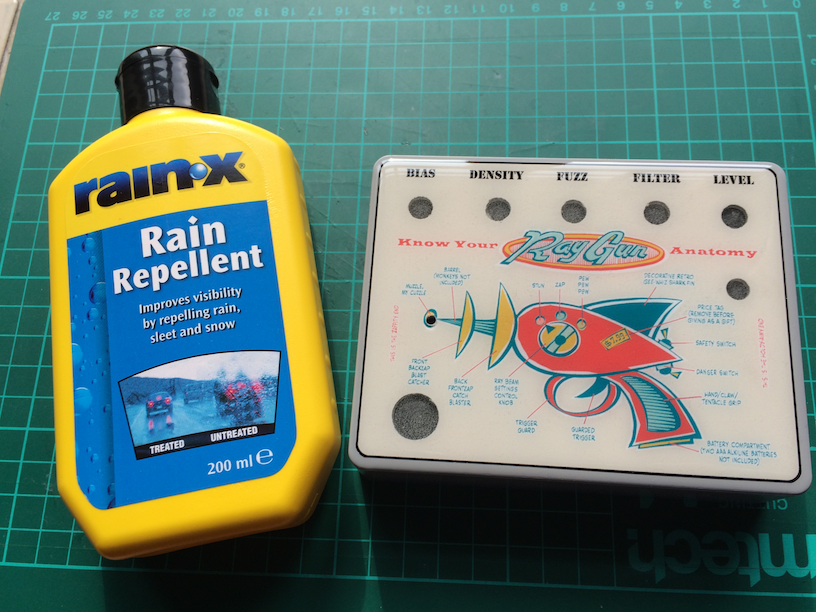
Methylated Spirits – Got this from B&Q. Very handy on a cloth to clear up any drips and spills.
Mixing cup – Any plastic cup will do. But not too big or small.
Small 30ml measuring cups – You can get these on eBay or Amazon. They have markings on them which are vital to measure out the two parts of the Envirotex (hardener and resin).
Paper Plate – Handy to put the enclosure on. You can turn it around when working.
Paper towel – get these fairly lint-free ones from Halfords.
Lollipop Sticks – one big one for mixing and one thinner one for dobbing. Get them from Amazon or eBay.


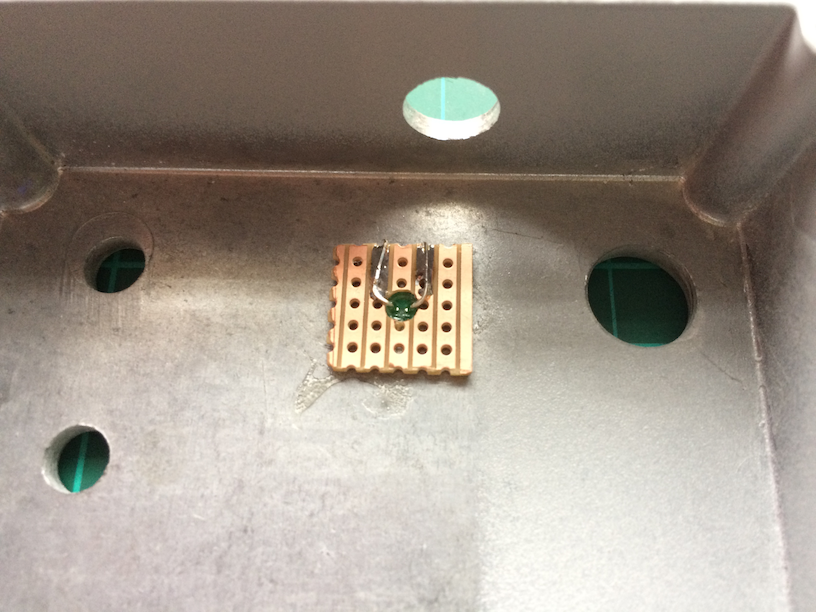
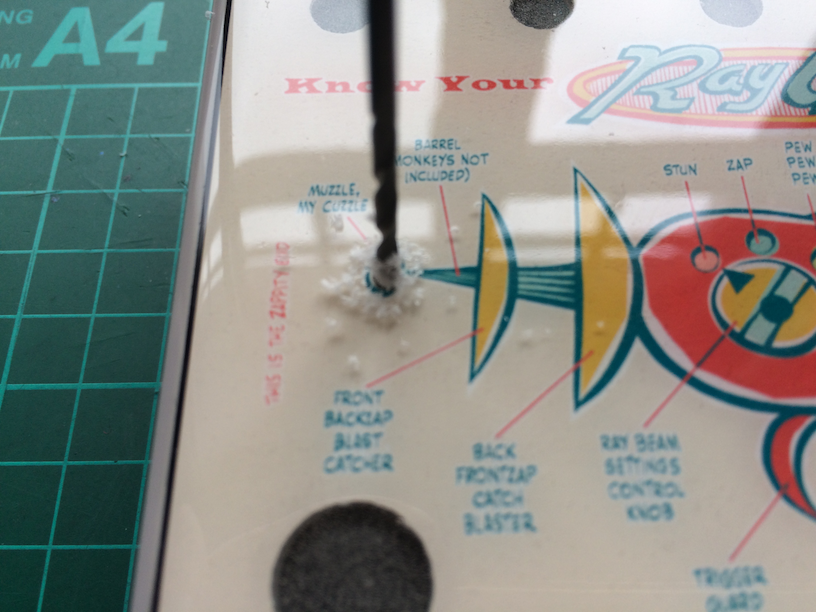
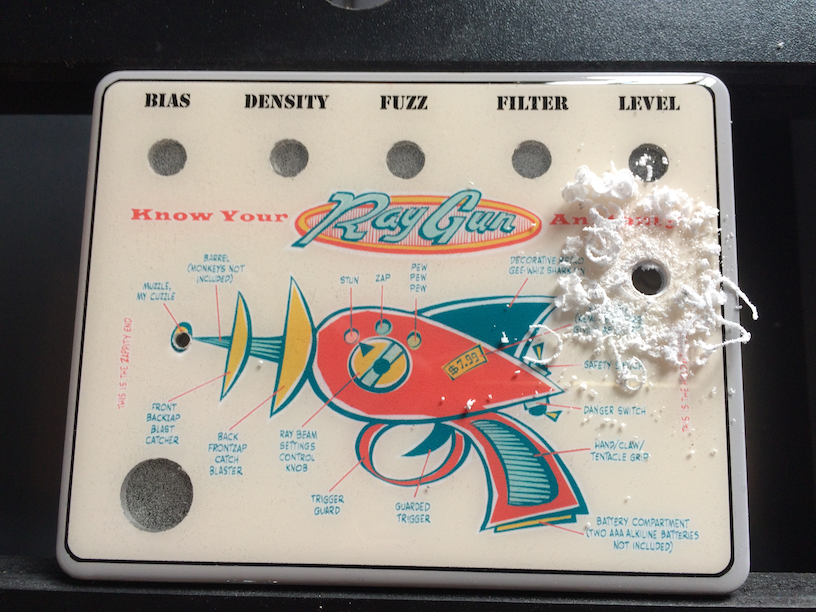
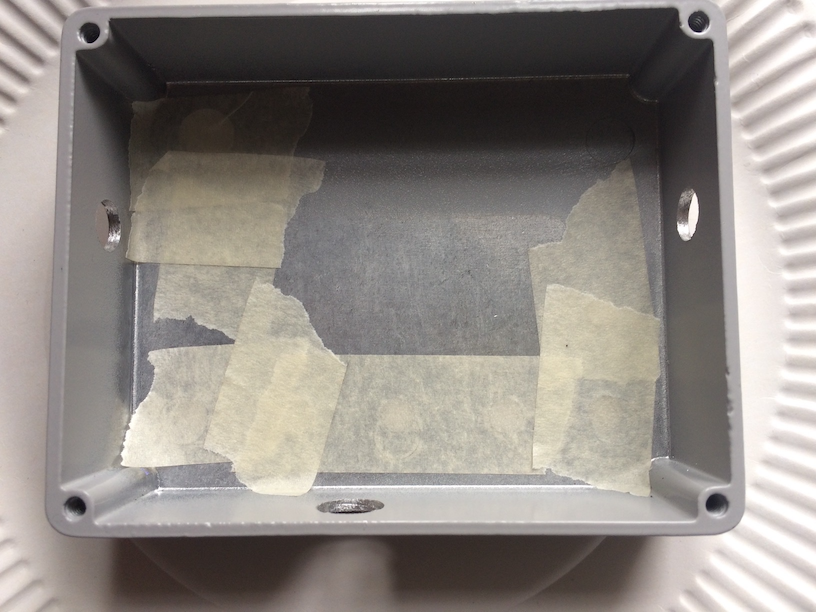
First thing to do is to tape up the inside of the holes in the top of the enclosure. This obviously stops the resin from escaping down the plug-hole:


Then I’ll measure out exactly equal quantities of the Envirotex resin and hardener. I’ve marked some lines with a pen on the measuring cups at the 8ml marks. A total of 16ml should be enough to cover a 1590BB.

It’s very very important to measure out exactly equal amounts and to not use too little of the stuff. The smaller the quantities involved the more room for error there is in getting exactly equal amounts. I once made the mistake of using plastic teaspoons to measure and I must have got the proportions wrong as it never hardened, and I had to scrape it off and start all over again. Better to err on the side of more rather than less.


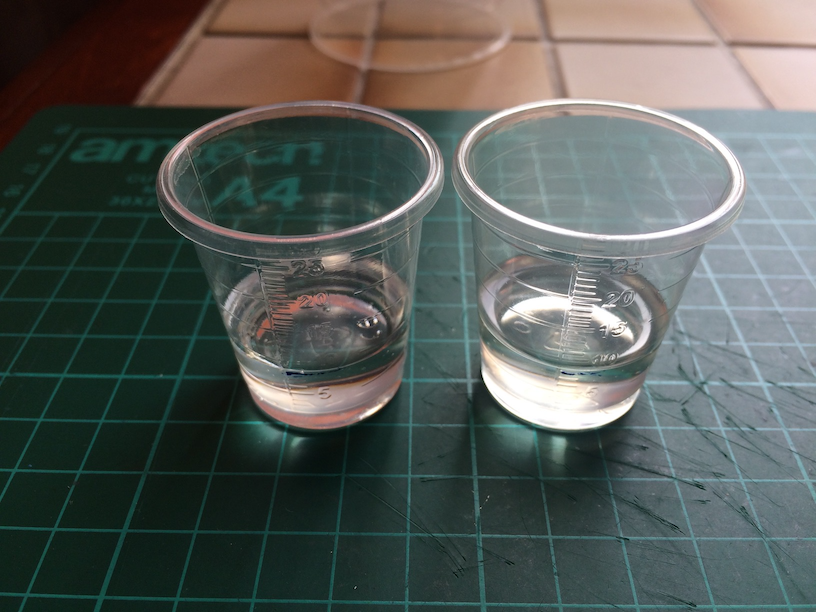
I use the large wooden stick to mix the two parts together in the larger plastic cup. This needs to be done for at least two minutes. Make sure you don’t leave any unmixed parts that might have dripped down the inside of the cup.


Then I gently pour the goo onto the top of the enclosure. I fill the holes first, then I work from the centre outwards pushing the goo to the edges of the enclosure with my wooden dobber. Don’t worry about the bubbles in the mix at this stage, just focus on spreading it to the edges and aiming for a consistent coverage. Envirotex is self-levelling so this will help.

Also, at this stage, take your time and focus. The instructions for ET make it sound as if you’ve got very little time to work with this stuff, but you’ve easily got up to an hour to manipulate it.

To get rid of the bubbles, gently breathe on the surface (bubbles hate carbon dioxide). Or run a lighter flame over the top.


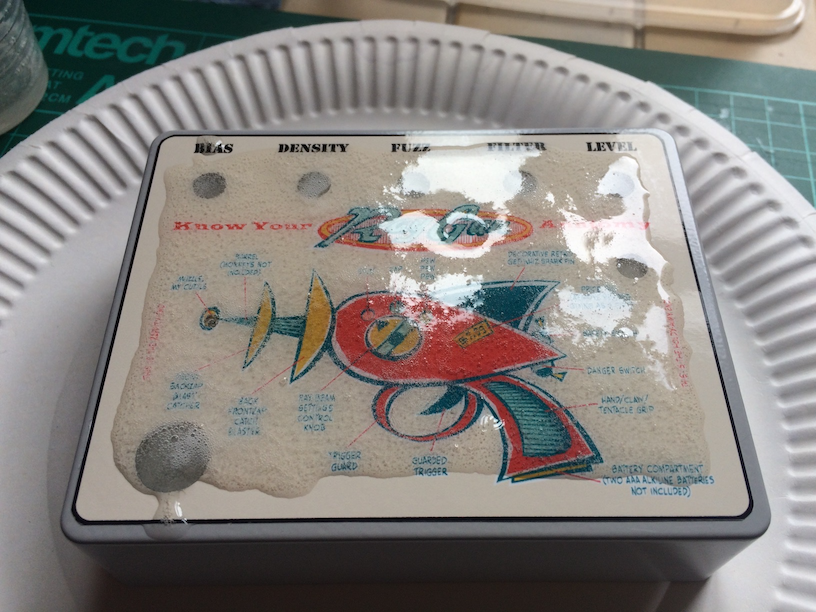
Here it is covered with the Envirotex and and all the bubbles removed (for now, at least):


Then I put a plastic food container over the whole thing to protect it from dust:


But the job doesn’t stop now. Envirotex has a nasty habit of still producing small bubbles even after a few hours. So every 20 minutes or so I inspect the surface and, if any bubbles appear, I zap them with the flame of a lighter. I’ll babysit this now for the next 4-5 hours or so. Boring!

Unfortunately, the more you uncover the thing and expose the ET, the more chance there is of getting dust and fluff particles on it. I still haven’t solved this problem, as I don’t live in a dust-free zone. As I typed this I just removed a small fluff with a pair of tweezers. Grrr….

Once I’m sure that the ET is going off and hardening I’ll have to leave it alone for 4-5 days before I can drill out the holes and move onto the next stage.

Begin typing your search term above and press enter to search. Press ESC to cancel.